Ceiling Fan Installation Guide
While installing or replacing a ceiling fan might seem complex, the installation process is relatively straightforward. With a few basic tools and materials, you can learn how to hang a ceiling fan in just a few steps. Keep in mind that this ceiling fan installation guide is a supplement to the manual for your specific ceiling fan model; use the manual that came with your ceiling fan for detailed installation instructions.


The following Hunter Fan ceiling fan installation guide should assist you in navigating the process of how to install a ceiling fan, with step-by-step instructions for removing an existing fixture, ensuring proper ceiling fan wiring, and more. When referring to our ceiling fan installation guide, please keep the following in mind:
- The videos and instructions included in the guide generally apply to the installation of most Hunter fans; however, instructions for your specific fan model may vary slightly.
- This guide should only be used as supplementary material to the specific model fan manual included with the purchase of a Hunter ceiling fan.
- Always refer to your manual for the most accurate instructions to install your fan. If your manual is lost, you can easily find and download the specific model manual for your Hunter fan.
- As an alternative to DIY ceiling fan installation, you can hire a professional to install your fan. Through Hunter’s partnership with HomeAdvisor, the largest home improvement network in the U.S., you can find a qualified professional that HomeAdvisor has vetted to install your new fan.
Project Details
Duration: 1 – 2 hours
The time it takes to install your fan can depend on various factors, including your skill/experience level and whether you’re working alone or with an assistant. Typically, installing a Hunter ceiling fan will take around one to two hours, although the specific fan model you have could impact the installation time.
Skill Level: DIY Friendly
While installing a ceiling fan doesn’t require extensive experience, every situation is unique, and some installation projects may require more skill than others. If your project involves additional wiring or if you don’t feel comfortable with any aspect of the installation process, it’s best to contact a licensed professional electrician for assistance.
Cost: Varied
The amount of money you spend on this project will vary based on the cost of the fan and whether you already own or need to purchase/rent the necessary tools for the project. For more information on pricing, read about the costs of a standard replacement and the installation of a new ceiling fan.
GETTING STARTED
Before starting your Hunter ceiling fan installation project, follow these steps to ensure a smooth and safe process:
01.Make sure to keep the fan at a safe distance from other walls and the floor. Maintain a distance of 7 feet or more between the floor and the fan blades.
02.The tips of the fan blades should have a clearance of 30 inches from the nearest wall or obstruction.
03.If you’re installing your ceiling fan on a sloped ceiling, you’ll need to purchase an additional downrod. When installing on a sloped ceiling, measure the angle of the ceiling. If the measurement exceeds 34 degrees, you’ll also need to purchase a sloped ceiling mounting kit.
04.Turn off the power at both the wall switch and the circuit breaker.
Hola
Before beginning a ceiling fan installation project, be sure to follow these general safety rules to avoid the risk of personal injury and property damage:
- Turn off power at the circuit breaker before starting the project. Power should be left off until the fan installation is completed.
- Follow all manufacturer’s instructions for additional safety information, precautions, and warnings.
- Ensure that the installation site has an approved ceiling fan-rated electrical box properly installed that is rated for the weight of your fan or confirm that you can hang your fan from the building structure.
- All wiring must conform to national and local electrical codes ANSI/NFPA 70.
- Ensure there are no obstructions at the ceiling fan installation site.
- Always verify which wires are live/hot using a digital multimeter
If you’re not comfortable completing the fan wiring step or handling any other part of the installation process, hire a certified professional electrician.
Hola
- To prevent damage to the fan, ALWAYS lift by holding the fan housing or downrod.
- To prevent serious injury or death, ensure all screws are tight to secure the light fixture.
- To prevent serious injury or death, ensure the light glass is securely in place.
- To prevent serious injury or death, ALWAYS tighten the setscrew with pliers and NOT by hand. CHECK the tightness of the setscrew with pliers each time you change the direction of the ceiling fan.
- To reduce the risk of personal injury, do not bend blade brackets when installing blade brackets, balancing blades, or cleaning the fan. Do not insert foreign objects between the rotating fan blades.
If you ever need to replace a part of a Hunter ceiling fan, make sure to use only Hunter replacement parts. If you need to change bulbs, use bulbs of the same wattage.
Hola
Before starting the ceiling fan installation project, have the right set of tools on hand for a safe job and timely finish. While the specific tools you’ll need for your fan may vary based on its brand and model, here are some tools you should have at your disposal:
 Ladder |  Screwdriver |  Circuit tester |  Electric drill |
 Pliers |  Wire stripper |  9/64” Drill bit |
STEP 1
Uninstalling and Removing an Existing Fixture
Installing a new ceiling fan versus replacing an existing fixture requires different methods. Learn how to replace a ceiling fan with these simple steps:
01.Turn off the power at the wall light switch and the circuit breaker.
02.For added safety, place a piece of adhesive tape over the wall light switch and the circuit breaker to ensure they don’t accidentally get turned on again while you install the fan.
03.Before making contact with any electrical wiring, use a circuit tester to verify that the power is turned off.
04.Disconnect the wires and screws from the existing fixture that are securing the fan to the ceiling.
05.After uninstalling the existing fixture, verify that the electrical box is suitable for a ceiling fan. The ceiling fan box should be able to support 70 pounds
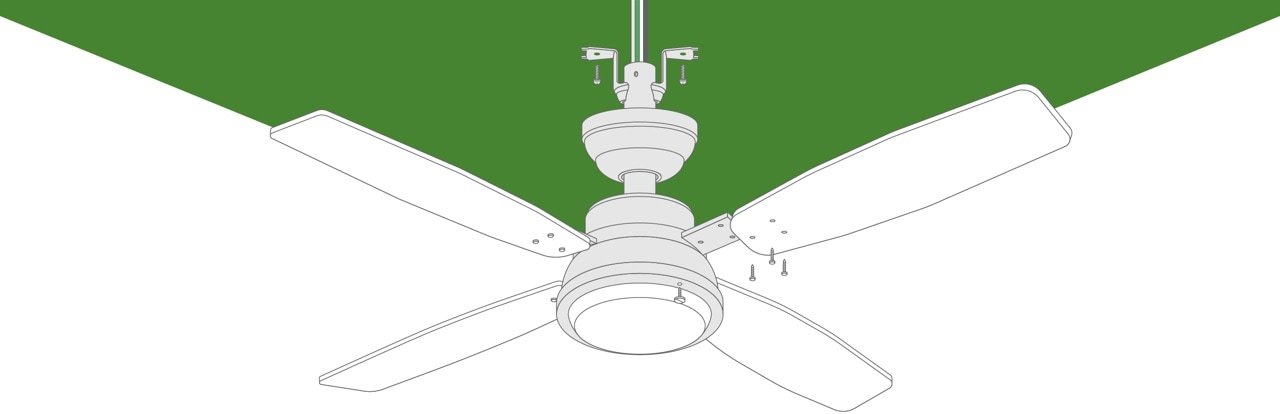
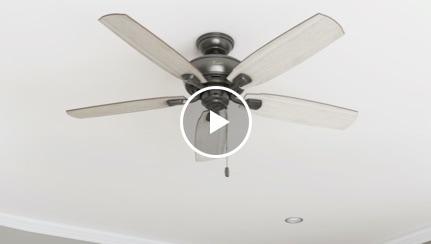
STEP 2
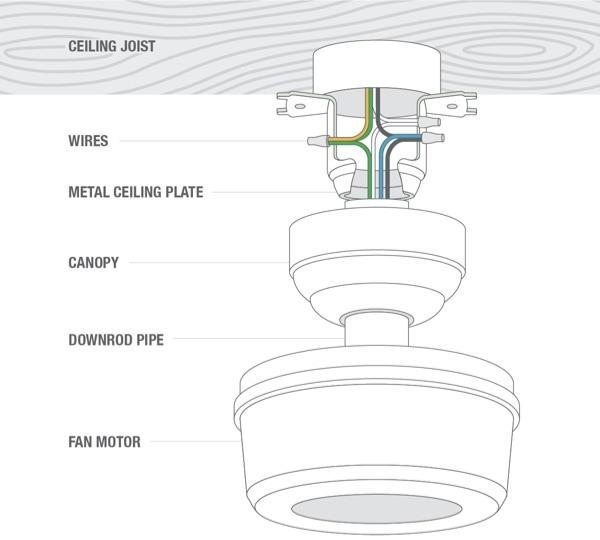
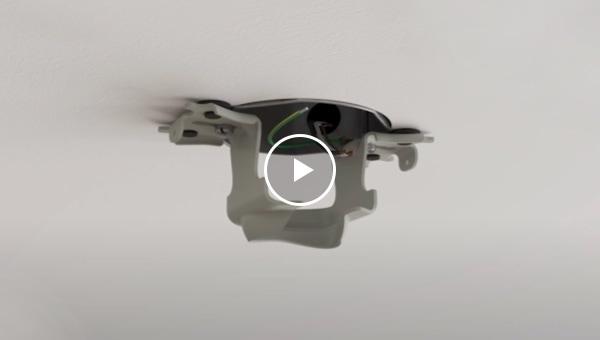
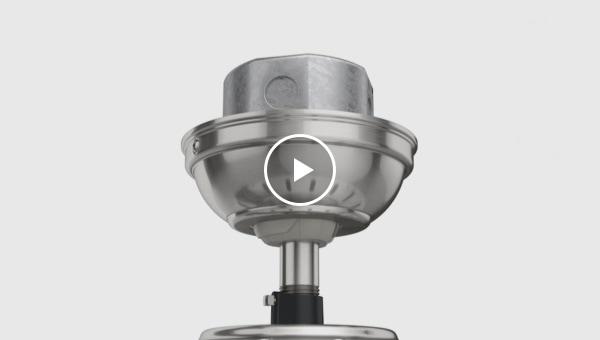
Install the ceiling bracket.
To ensure that the ceiling fan is securely attached to the structure, you should use the Hunter bracket that came with your fan. The bracket should be installed onto a box that hangs between the joists or inserted into a brace that is positioned between the joists, depending on where you are installing the ceiling fan.
For fans with an extension rod
There are two ways to secure the ceiling bracket to the ceiling: using the metal screws included with your ceiling fan box or using the wood screws and washers included with your Hunter fan. If you use wood screws to secure the bracket to a structure with an approved electrical box, you will need to drill 9/64″ pilot holes in the support structure. Follow the manufacturer’s instructions carefully to ensure a secure and safe installation.
01.Remove the pre-installed set screw from the motor adapter and set it aside. You will need the set screw later, so make sure not to lose it.
02.Thread the wires connected to the fan through the downrod, then hand-tighten the downrod. This step will take at least four to five mins.
03.Reinstall the set screw and use pliers to tighten it. To prevent injuries, do not tighten the set screw by hand.
04.Using wire cutters or pliers, trim the wires, leaving 8 inches of wire from the top of the downrod.
05.Using wire strippers, strip 3/8 inch of insulation from the top of the wires.
06.Slide the canopy over the downrod and wires.
07.Lift the fan by its downrod or housing and insert the ball on the downrod into the slot on the ceiling bracket.
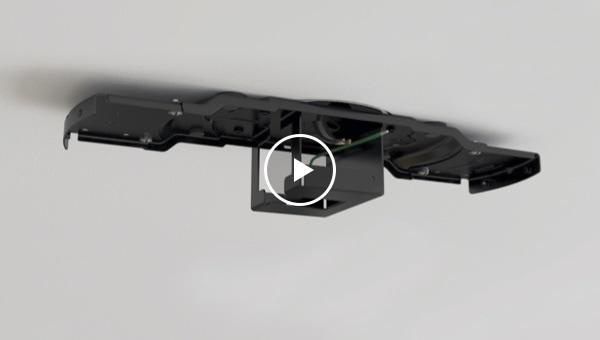
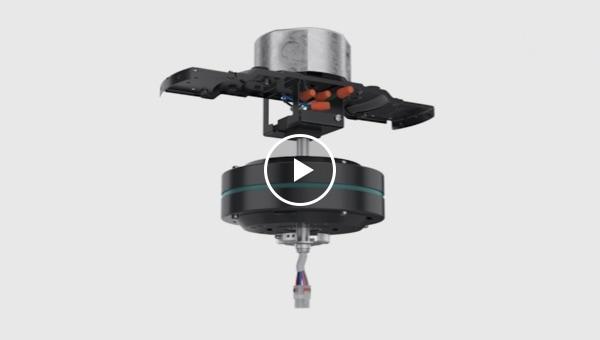
For low-profile fans
When installing a low-profile fan, you can mount the motor and wire it without using a downrod or canopy. The mounting bracket for a low-profile fan looks different compared to a downrod fan’s bracket, but it uses the same two methods to secure it to the ceiling: using the sheet metal screws included with the fan box or using the wood screws and washers included with your Hunter fan. To secure the bracket with wood screws in a structure with an approved electrical box, drill 9/64-inch pilot holes in the support structure.
01.While keeping the wires out of the way, lift the motor assembly and slide the square hanger ball into the opening on the ceiling bracket.
02.Locate the ground wire attached to the top of the motor shaft. Make sure the ground wire is positioned outward from the large opening of the ceiling bracket.
03.Secure the motor to the ceiling bracket using two locking screws.
STEP 3.
Connect the ceiling fan.
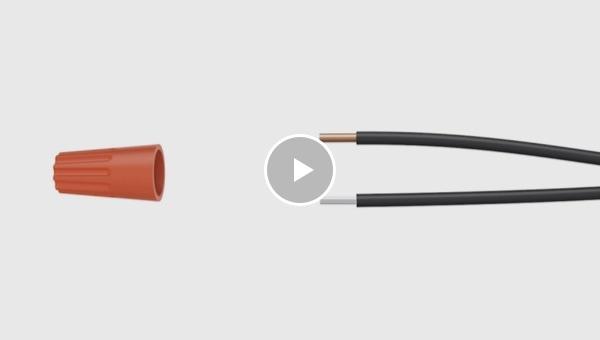
Let’s start with the basics of how to wire your ceiling fan: join the bare metal ends of the wires and connect them with a wire nut. Twist the wire nut clockwise until it’s tight. Gently tug on the wire to ensure that none of the wires are loose.
WARNING: All wiring must comply with national and local electrical codes ANSI/NFPA 70.
If you are not comfortable with wiring the fan, consult with a certified professional electrician.
Wiring a Fan with a Standard Pull Chain
Ceiling fans with pull chain do not come with a remote receiver of any kind. For ceiling fans without a remote receiver, follow these steps to connect your fan.
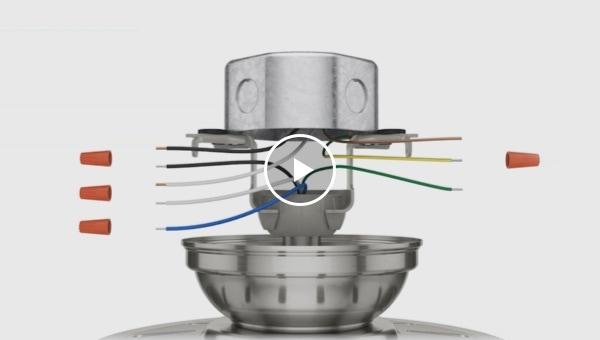
If you have a single wall switch, use wire nuts to:
01.Connect the white (ground) wire from the ceiling to the white wire of the fan.
02.Connect the black (hot) wire from the ceiling to both the black and blue wires of the fan.
03.Connect the three ground wires (green, green/yellow stripe, or bare copper) coming from the ceiling, downrod, and hanger bracket.
If you have a double wall switch, use wire nuts to:
01.Connect the white (grounded) wire from the ceiling to the white wire of the fan.
02.Connect the black (ungrounded) wire from the ceiling to the black wire of the fan.
03.Connect the second ungrounded (light) wire from the ceiling to the blue wire of the fan.
04.Connect the three grounding wires (green, green/yellow stripe, or bare copper) coming from the ceiling, downrod, and hanger bracket.
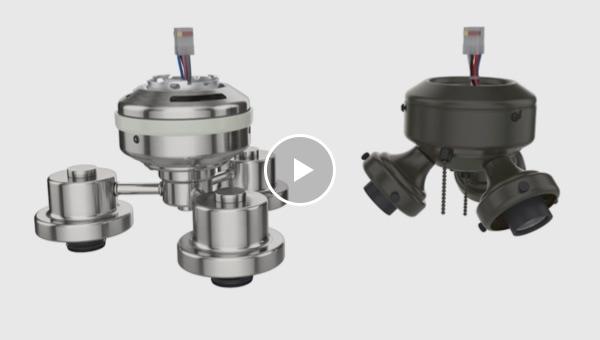
Wiring a Fan with a Pre-Installed Remote Receiver
Hunter ceiling fans with pre-installed remote receivers have the receiver integrated into the fan body at the factory. Our engineers innovated this technology to simplify the wiring of a ceiling fan. Remote control bases can be mounted on the wall. You can attach the remote controls to the bases to use them as a wall switch or remove the controls from the base and use them as handheld remotes. The light switch that powers the ceiling fan will likely be a single or double wall switch.
If you have a double wall switch, use wire nuts to:
01.Connect the white (grounded) wire from the ceiling to the white wire of the fan.
02.Connect the black (ungrounded) wire from the ceiling to the black wire of the fan.
03.Connect the three grounding wires (green, green/yellow stripe, or bare copper) coming from the ceiling, downrod, and mounting bracket.
04.Cover the blue wire from the fan. You won’t need it for single switch wiring.
If you have a double wall switch, the steps to connect the wires using a wire nut will be similar to the previous steps. The only difference is that, instead of capping the end of the blue wire in step 4, you will use a wire nut to connect the second non-ground wire (light) from the ceiling to the blue wire of the fan.
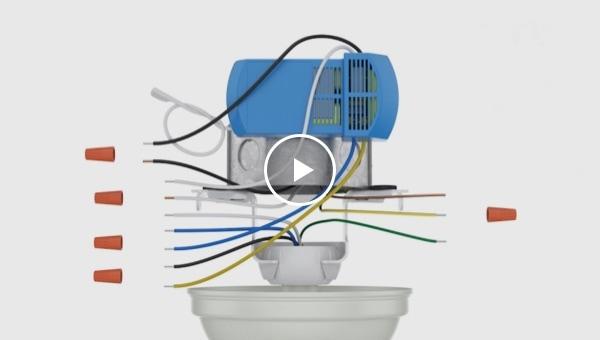
Wiring a Fan with a Remote Receiver
Most Hunter ceiling fans come equipped with a pre-installed or separate remote receiver. If you’re wondering how to connect a ceiling fan with a separate remote receiver, use wire nuts to:
01.Connect the black (ungrounded) wire from the ceiling to the black wire from the receiver.
02.Connect the white (grounded) wire from the ceiling to both the white wire of the receiver and the white wire of the fan.
03.Connect the yellow wire from the receiver to the black wire of the fan.
04.Connect the blue wire from the receiver to the blue wire of the fan.
05.Connect the three ground wires (green, green/yellow stripe, or bare copper) coming from the ceiling, downrod, and hanger bracket.
STEP 4
Finish installing the canopy or motor housing.
If you are installing a ceiling fan that requires a downrod, you will need to finish installing the canopy. If you are installing a low-profile ceiling fan, you will need to finish installing the motor housing.
Ceiling Fans with Downrods
To install the canopy for a ceiling fan with a downrod:
01.Insert the wires and wire nuts into the junction box.
02.Lift the canopy into place, making sure the triangular openings and screw holes are aligned.
03.Using a screwdriver, insert and securely tighten the canopy screws. A magnetic screwdriver will provide better visibility when securing the canopy.
Low-Profile Ceiling Fan
To install the motor housing for a low-profile ceiling fan:
01.Insert the wires and wire nuts into the junction box.
02.Lift the motor housing until it is properly positioned over the motor and ceiling brackets.
03.Rotate the motor housing until the screw holes align with the holes on the bracket. The notch inside the housing should fit in place with the notch inside the ceiling bracket.
04.Keep the motor housing in place. Use a screwdriver to insert and securely tighten the four screws of the motor housing.
STEP 5
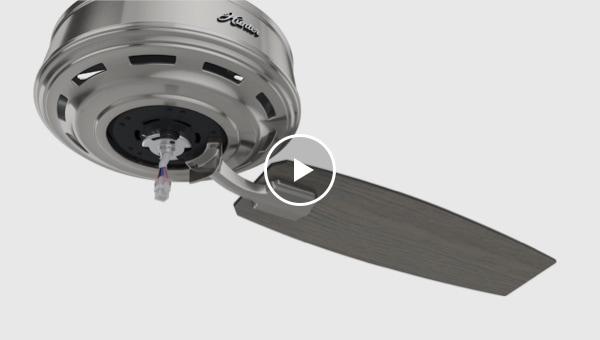
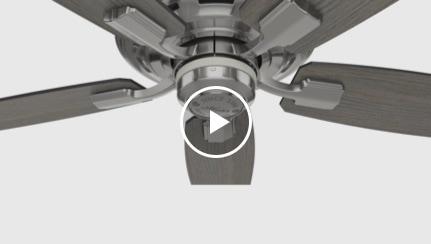
Install the fan blades
Your Hunter fan comes with the necessary parts you’ll need to install the fan blades. There are three methods for installing common fan blades on Hunter ceiling fans:
STEP 5
Install the fan blades
Your Hunter fan comes with the necessary parts you’ll need to install the fan blades. There are three methods for installing common fan blades on Hunter ceiling fans:
Ceiling Fans with Iron Blades
01.Insert washers into each hole at the end of the blades.
02.Use the respective screws to attach each blade to the blade irons.
03.Place the blade irons onto the motor, making sure all screw holes are properly aligned. Tighten the screws gently by hand and then use a screwdriver to securely tighten them.
Half-Body Blades
01.Insert the blades into the openings and align the holes on the blades with the blade irons.
02.Secure each blade to an iron plate using the three blade washers and provided blade mounting screws. Make sure the screws are securely tightened.
Snap-on Blades
01.Align the three holes of the blade with the three iron posts of the blade.
02.Tighten the blade and the iron post of the blade together. Note that the flared top of the iron blade posts will be fully visible above the blade when properly assembled.
STEP 6
Install the lighting
Quick Connect Fans vs Non-Quick Connect Fans
To assemble a fan with a light kit, first identify if your fan has a Quick Connect feature by examining the switch housing. Hunter Quick Connect fans have a distinctive locking mechanism located on the switch housing. These fans also have a ring surrounding the switch housing in the middle. Hunter fans without Quick Connect technology do not have any of these features.
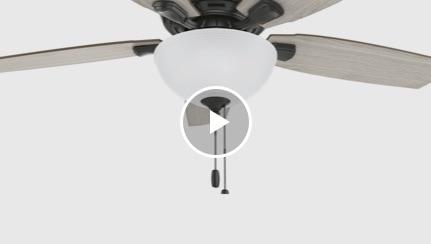
CEILING FANS WITH LIGHTS
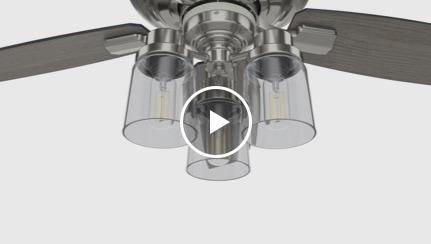
01.Before you begin, remove the cardboard plug protector.
02.Connect the fan and light fixture plugs together. Make sure to align the color-coded marks on the connectors.
03.Push the connectors and the additional cable through the hole located at the top of the light fixture.
04.Carefully connect the light fixture to the bottom of the fan. Ensure that the mounting holes on the top ring of the fixture align with the gaps in the mounting bracket on the bottom of the fan.
05.While holding the fan body steady, twist the light fixture clockwise to engage the locking pin. Listen for a clicking sound to confirm that the locking pin is securely in place.
06.Remove the plug rings to install the light glass.
07.After installing the glass, reattach the light rings onto the plugs.
08.Use the glass ring tool that came with your fan to turn the light rings clockwise until they are tight.
09.Install the included light bulbs into each socket.
01.Choose any two holes on the switch housing mounting plate to screw in two of the housing assembly screws halfway.
02.Thread the wire connector through the center of the upper switch housing.
03.Wrap the eyelet slots around the screws and then turn them counterclockwise.
04.Use a screwdriver to install the third screw and then tighten the remaining two screws.
05.Partially install two of the switch box screws halfway.
06.Connect the upper and lower switch housing together using the plug connectors, ensuring that you align the color marks.
07.Locate the notches on the sides of the lower switch housing and align them with the screws located in the upper switch housing.
08.Lock the switch housing in place by turning the bottom clockwise.
09.Use a screwdriver to install the third screw of the housing. Tighten all screws.
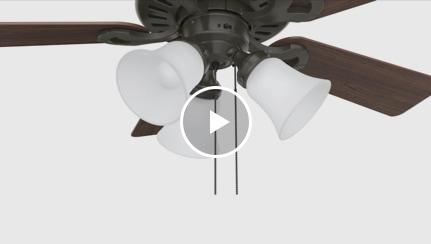
10.To install the light shades, first loosen the butterfly screws. Then, lift each shade towards the lamp and insert and tighten each butterfly screw.
11.Install one light bulb in each socket.
12.Attach the pull chain pendants to the appropriate short chains coming from the switch housing.
01.Connect the fan and light connectors. Make sure to align the color-coded marks on the connectors.
02.Secure the connectors by pushing them and the additional cable into the hole located on the top of the lamp. This step will ensure proper mounting of the fan and light.
03.Carefully lift the lamp and place it onto the bottom of the fan. Ensure that the holes on the mounting ring located at the top of the light fixture are aligned with the spaces on the mounting bracket located at the bottom.
04.While holding the fan body steady, rotate the lamp clockwise to engage the locking pin. Listen for the clicking sound to verify that the connection is secure.
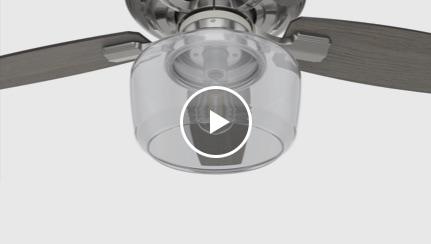
05.Lift the globe and use the three provided butterfly screws to attach it to the lamp. Tighten the butterfly screws by hand.
06.Install the provided light bulb into the socket.
01.Choose any two holes on the switch housing mounting plate to screw in two of the housing assembly screws halfway.
02.Thread the wire connector through the center of the upper switch housing.
03.Wrap the eyelet slots around the screws and then turn them counterclockwise.
04.Use a screwdriver to install the third screw and then tighten the remaining two screws.
05.Partially install two of the switch box screws halfway.
06.Connect the upper and lower switch housing together using the plug connectors, ensuring that you align the color marks.
07.Locate the notches on the sides of the lower switch housing and align them with the screws located in the upper switch housing.
08.Lock the switch housing in place by turning the bottom clockwise.
09.Use a screwdriver to install the third screw of the housing. Tighten all screws.
10.Thread the fan pull chain through the hole at the bottom of the light kit.
11.Install the light bulbs into each of the sockets.
12.Position both the globe and the globe holder against the metal plate, keeping them flush.
13.Thread the light pull chain through the hole located in the center of the cap. Next, pass the fan pull chain through the hole located on the side of the cap.
14.Thread only the light pull chain through the fob. Attach the fob to the threaded rod and tighten by hand.
15.Attach the short chains coming from the switch housing to the respective pull chain pendants.
CEILING FANS WITH LIGHTLESS CAPS
A lightless cap covers the part of the fan where a light kit would typically be installed. If you prefer to use a lightless cap instead of a light kit, follow these steps to install it correctly.
01.Remove the two screws from the light kit that connect the light kit to the bottom switch housing.
02.Disconnect the blue and white wires inside the light kit and the bottom switch housing.
03.To safely cap unused wires, install the provided dummy terminal included with the light cover. Attach the terminal to the ends of each wire located in the bottom switch housing.
04.Use a Phillips screwdriver to install the switch housing cover using the two switch housing screws you removed earlier.
05.Connect the upper and lower switch housing together using the connectors. Make sure to align the color marks on the connectors.
06.Carefully lift the switch housing and place it on the bottom of the fan.
07.Align the holes in the mounting ring located on the top of the switch housing with the spaces in the mounting bracket located on the bottom of the fan.
08.While holding the fan body as steady as possible, engage the locking pin by turning the lamp clockwise. Listen for the sound of a click to verify that the connection is secure.
STEP 7
Using the Remote Controls
Hunter offers a variety of ceiling fan controls that make it easy to control both the fan and the light. Most handheld and wall-mounted remote controls come pre-paired with the ceiling fan.
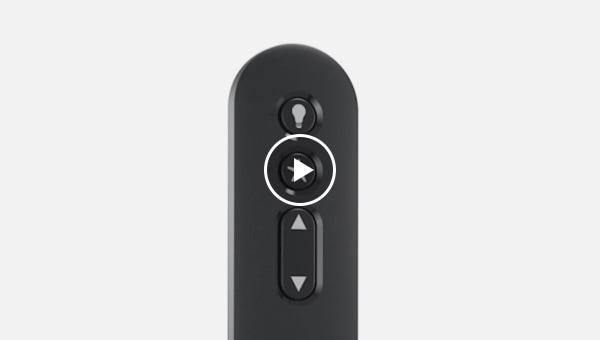
Handheld Remote Controls
Handheld remote controls allow you to conveniently control your fan’s functions. Follow these steps to use the remote control for your ceiling fan:
01.Install the included battery on the back of the remote control.
02.To turn the fan on and off, simply press the fan button.
03.Change the fan speed using the arrow button.
04.To change the fan direction, press and hold the fan button.
05.To turn the ceiling fan light on and off, press the light button.
06.Hold down the arrow buttons to enable the dimmable light options of the ceiling fan. Hold down the light button to dim the ceiling fan light.
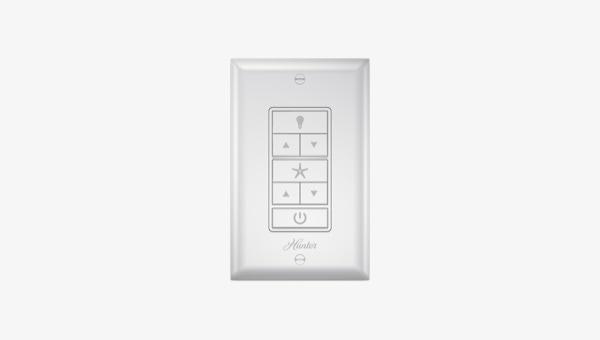
Wall Controls
Wall controls are installed in the wall switch, making it easy to remember where your ceiling fan control is located. Follow these steps to use your wall control:
01.Simply press the fan button to turn it on and off.
02.Change the fan speed using the arrow button.
03.Turn the ceiling fan light on and off by pressing the light button.
04.Use the arrow buttons to adjust the dimmable light.
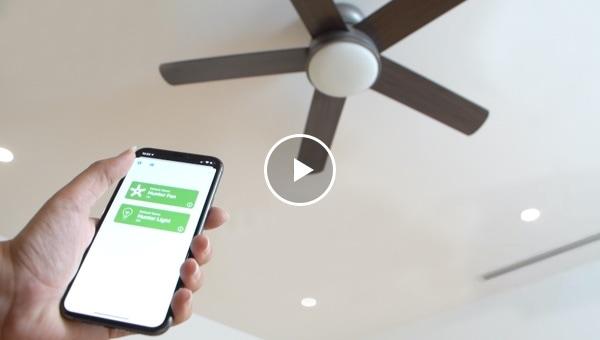
Smart Fan Controls
Smart Fan Controls allow you to use your smartphone or smart home devices to control your ceiling fan. Our SIMPLEconnect® collection of Wi-Fi enabled ceiling fans is managed through our SIMPLEconnect app on your smartphone and smartwatches. You can also control them with smart home devices such as Apple HomeKit, Amazon Alexa, and Google Assistant.
If you’ve been wondering how to install a ceiling fan, hopefully, this Hunter ceiling fan installation guide will successfully guide you through the process. Remember, hiring a certified professional electrician is always an option if you feel uncomfortable with any of the steps mentioned above.
After installing your new Hunter ceiling fan, you may need to perform regular maintenance on the fan from time to time. Use our simple ceiling fan installation tips to keep your Hunter fan running in excellent condition.